
Raspberry Fruit Leather
One of my favorite fruits is raspberries and I am fortunate to have a huge patch of raspberry bushes in our backyard. Each summer I anxiously wait for those first red juicy berries so the process of making raspberry pie, tarts, jam, syrup, scones and muffins can begin.
After a few weeks the berries keep coming but I’m worn out from making so many treats. I vacuum seal and freeze the remaining berries so we can enjoy them throughout the long winter. Frozen berries turn to complete mush when they defrost, however. That’s fine for jams and syrups though, and it’s especially wonderful for fruit leathers.
Fruit leathers are incredibly easy to make, they just take a bit of time. Here’s what you will need to make them:
Two baking sheets
Two silicon mats (or you can use parchment paper)
Blender
Strainer
Silicon spatula or wooden spoon
Line your baking pans with the silicon mats or parchment paper.


Add your berries, lemon juice and honey to a blender and blend for 10-15 seconds. Scrape down the sides and blend a few more seconds if necessary.

Place a strainer over a bowl and pour the berry mixture into the strainer. Use your spatula or spoon to stir the berries around, mashing them as you stir. The mixture will be soupy at first as the liquid starts to pass through the strainer. When the seeds begin to clog up the holes, it will take more effort to push the liquid through. Just keep stirring and mashing, stirring and mashing. The mixture will begin to thicken as more liquid passes into the bowl and seeds are left behind. This process can take a few minutes. When you’re left with mostly seeds in the strainer, scrape the underside to get the last bit of goodness into the bowl. Some of the seeds will make it through the strainer and this is fine. In fact, if you don’t mind the seeds, you can skip this part entirely and pour the mixture from the blender directly onto your silicon mats, but I warn you, there will be a lot of seeds.

Once you have the yummy goodness in the bowl, divide it equally between your two trays and pour it onto the mats. Smooth it out as level as you can so it will dry out evenly. You don’t want to have it thicker in one place and thinner in another.

One tray has been smoothed out and the other hasn’t.
Once you have it spread out evenly, place the sheets into the oven and bake for 2 1/2 to 3 hours. If you want the leathers to be more pliable, bake for less time. If you want them a little more crispy, bake for longer. They taste wonderful either way.
This works great with all sorts of fruit as well. I’ve made mango, strawberry and others, but my all-time favorite is raspberry.
I hope you will try these and love them as much as we do! Let me know how it turns out in the comments.

Raspberry Fruit Leathers
Ingredients
- 5 Cups raspberries fresh or frozen and thawed
- 1 TBSP lemon juice
- ¼ cup honey
Instructions
- Preheat oven to 170 degrees.
- Line two baking sheets with silicon mats or parchment paper.
- Place raspberries, lemon juice and honey in a blender and puree for 10-15 seconds, scraping down the sides if necessary.
- Place strainer over a bowl and pour the raspberry mixture into the strainer.
- Stir and mash the mixture with a spatula, forcing the liquid into the bowl while the seeds remain in the strainer. (A few seeds will go though and that's ok.)
- Pour the mixture onto the baking sheets and spread out evenly with a spatula.
- Bake for 2 1/2 to 3 hours, rotating the trays and alternating levels half way through. The mixture should be slightly tacky but not wet.
- Cool to room temperature. Place leathers on parchment paper and roll up. Store in an airtight container.
One of my favorite fruits is raspberries and I am fortunate to have a huge patch of raspberry bushes in our backyard. Each summer I anxiously wait for those first red juicy berries so the process of making raspberry pie, tarts, jam, syrup, scones and muffins can begin.
– Judy Anne Parker
The Latest Blog Posts

Field Trip to a Greenhouse
Field Trip to a Greenhouse The calendar says spring is here but all I can see outside my windows is snow. Thankfully, the daylight is increasing dramatically, the squirrels are practicing acrobats in the trees, and the piles of snow are shrinking. However, I still...
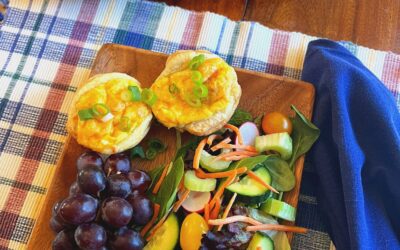
Mini Salmon Quiches
Mini Salmon Quiches One of my favorite things to do in the summer is fish for salmon with my husband. I am very happy to say that we have improved drastically over the last few years, and we can actually catch some fish now. At least most of the time. Okay, some of...
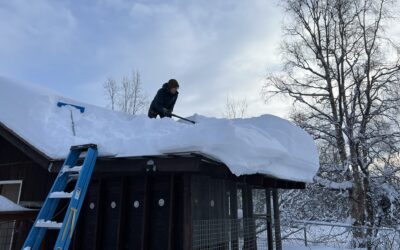
The Weight of it All
The Weight of it All We have received over eight feet of snow so far this season! I know that is not a lot for some places in the world, but for our neck of the woods, it’s the most ever officially recorded. The snow evaporates and compacts down, so we don’t have that...